How Can We Help?
1. Go to Dashboard

You can see “Dashboard” in the top right corner of any page. This is the dashboard where you manage your album proofs.
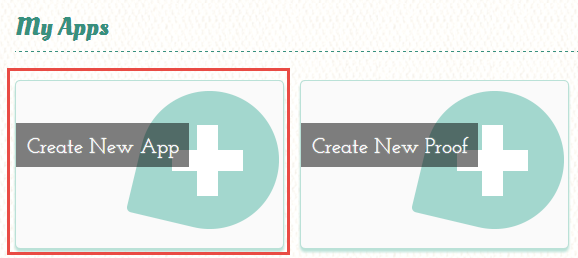
2. Click “Create New App”
3. Upload your photos After giving your app a name, you can upload your photos straight from your desktop or mobile device by dragging and dropping them onto the page. You will instantly see the progress of the upload in your browser, and small thumbnails will appear as soon as each photo is completed.
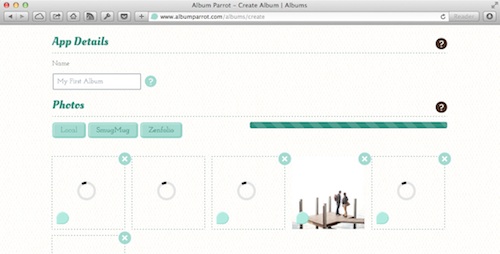
Once your photos are uploaded, you can drag and drop them to reorder them within the app, and select the button in the lower left as a quick way to set the icon for the app. You can always replace it at a later stage. Use the cross in the upper right corner to remove any photos you need to.
More reading
3. Design your branding There are many aspects of your app that you can customise. There are two types of app you can create – grid style, and album style. The grid style will display your photos as thumbnails in their original aspect ratios. Selecting a photo will launch a slideshow of all the photos that your customers can swipe between. The album style will layout your photos as if they will in a paper album. Customers will be able to flick the pages to go between each of the photos. This style works well for albums that you have already laid out for print.

If you have already selected a photo to use an icon, this will be displayed here. It is automatically sized for the purpose. If not – or you aren’t happy – you can upload your own custom icon here. Again – drag and drop works here too. You can provide contact details so that your customers know how to find you. If you fill them out, they will be displayed at the bottom of the app.
Finally you should select which social networks that you want to allow your customers to share the app on.
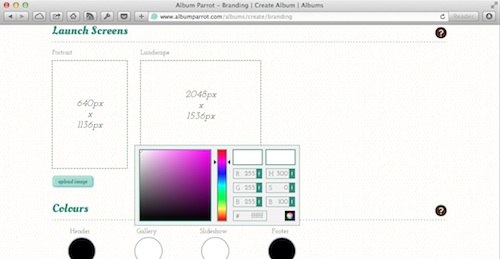
On the branding screen, you can upload a logo to put your stamp on the app. This will ensure that the word of mouth marketing does its job. You can also use the launch screens and the customisable colours to reinforce your brand.
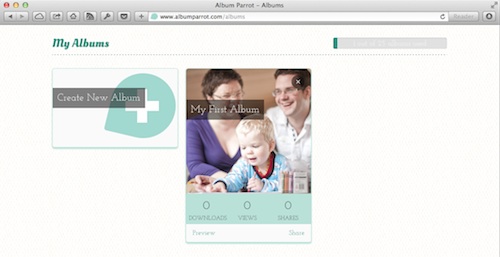
4. Preview and share your app Once you’ve saved the app – that’s you. We automatically create all the optimal sized images for the finished app, and distribute them to many points around the world so that customers accessing your app don’t have to wait around too long to see it.
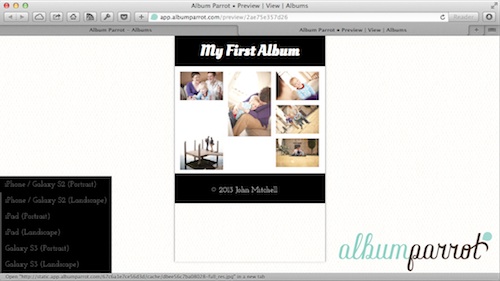
From here you can preview your app as it will appear on a number of different sized mobile devices.
From here on out, it’s down to you to ensure that you get the app to your customer in the most appropriate way. You can do this by simply sending the link in an email, but we also provide a number of easy ways to get the message out there by publishing on Twitter or Facebook.